The 60-Second Answer
FOUR RULES, EVERYTHING ELSE IS DETAIL
Spray it if you can
An airless sprayer never touches the texture, so nothing can pull loose. The trade is an hour or more of masking. Empty rooms and whole-house repaints almost always come out ahead spraying.
Rolling? Thick nap, light hand, one pass
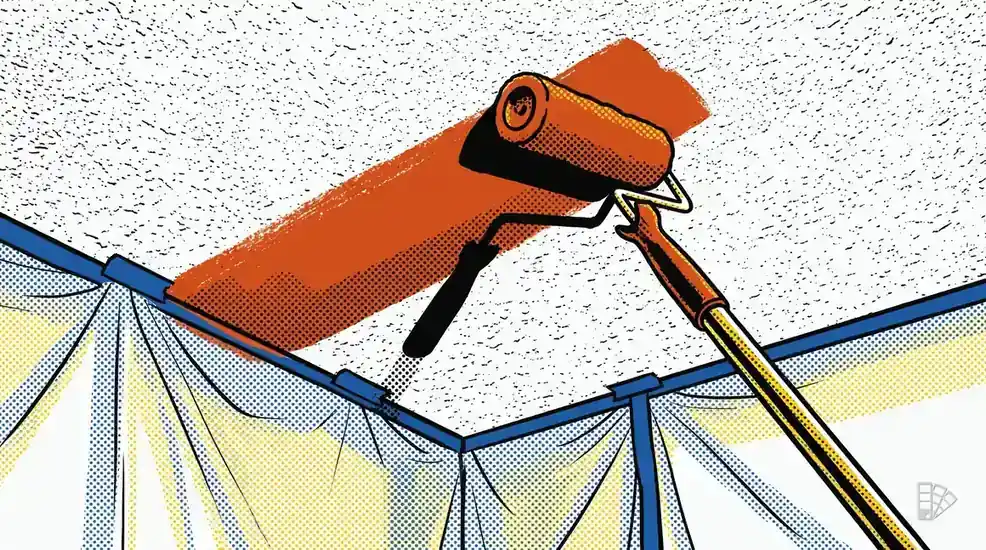
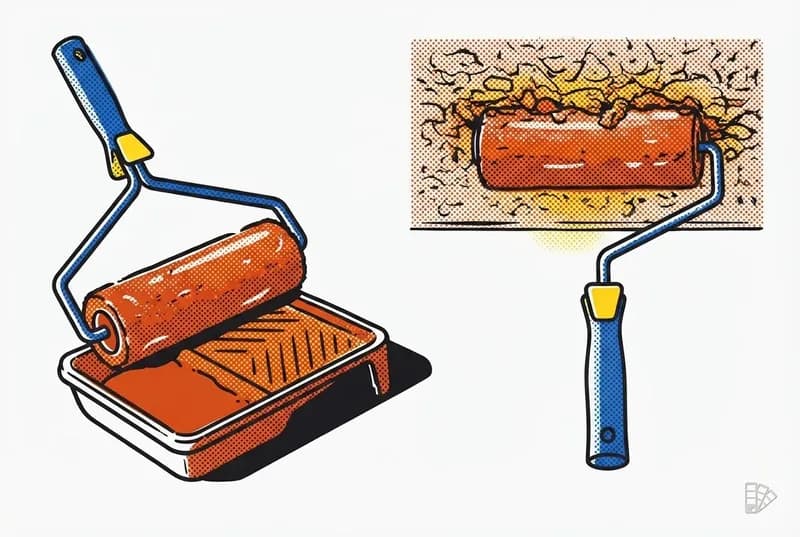
A 3/4" to 1 1/4" nap (or a slit-foam texture sleeve) floods the valleys without pressing on the peaks. Load it heavy, roll slowly in one direction, and leave it alone.
Two thin coats beat one wet one
Texture releases when it gets soaked. The first coat is a seal coat that will look patchy — that is correct. Let it dry hard, then build the color on coat two.
Never painted before? Prime with solvent first
Raw acoustic texture is water-soluble. Latex re-wets the binder and the aggregate rolls straight onto your nap. Seal it with an oil-based or shellac primer before any water-based paint.
Everything above assumes intact texture on a ceiling that has already cleared the asbestos question. Flaking, sagging, or water-stained popcorn is a repair job first — see when texture comes off anyway.
Why Popcorn Texture Falls Off When You Paint
Two different things pull texture off a ceiling, and they need different answers. The first is chemical: the texture gets soaked and its binder lets go. The second is mechanical: the roller is pressing on the peaks instead of coating around them. A thin nap causes both at once, which is why the same 3/8" sleeve that gives you a perfect smooth ceiling is the worst tool in the van here.
3/8" nap
Rides the peaks
Coats the high points, leaves the valleys bare, and puts all the pressure on the tips of the texture — exactly where it breaks off.
1" nap
Fills the valleys
Long fibers bend around the aggregate and release paint into the low spots without the roller body ever loading the peaks.
Cross-section through a popcorn ceiling. The nap has to be deeper than the texture is tall, or you end up pressing instead of coating.
Before you decide on primer, work out which of three states your ceiling is in. This single question decides whether the job is a two-hour repaint or a repair project:
How to tell: Press a fingertip on it in a closet. Chalky white residue, or a few grains that drop off, means raw texture. Touch a damp cotton swab to a hidden corner: if it softens or smears within about 30 seconds, the binder is still water-soluble.
What is happening: Original spray-applied acoustic texture is aggregate (vermiculite, perlite, or expanded polystyrene) held in a water-based binder. That binder never stopped being water-soluble. Roll wet latex onto it and you are dissolving the glue and picking the aggregate up on the nap at the same time.
What to do: Seal it before any water-based product touches it. An oil-based stain-blocking primer or a shellac primer locks the aggregate down and gives latex something to grip. Spray the primer if you own or can rent a gun — that is the zero-contact option. If you must roll primer on, one slow pass with a thick nap and no going back.
WATCH OUT
Do not “clean” a popcorn ceiling with a damp cloth or sponge before painting, the way you would prep a wall. Water is the enemy here. Dust it with a vacuum brush held a half-inch off the surface, or a dry microfiber duster on a pole. If the ceiling is greasy — kitchens, smokers’ rooms — skip washing entirely and seal it with a shellac primer, the same product that handles adhesion failures elsewhere in the house.
Roller vs Sprayer: Which One to Use
On a smooth ceiling this is a preference. On popcorn it is closer to a rule: if the room is empty and the texture has never been painted, spray it. The gun never loads the aggregate, so the single biggest failure mode disappears. The reason people still roll is that masking a lived-in room takes longer than the rolling does.
| FACTOR | ROLLER | AIRLESS SPRAYER |
|---|---|---|
| Texture risk | Moderate — technique decides it | Near zero — nothing contacts the ceiling |
| Raw, never-painted texture | Only over solvent primer, and gently | The right answer, primer and finish both |
| Masking / setup | 20-30 min: drop cloths, wall line, fixtures | 60-120 min: plastic on walls, floor, every opening |
| Application speed, 12x12 room | 45-70 min per coat | 10-15 min per coat |
| Paint used | Baseline | Add 15-25% for overspray and hose fill |
| Equipment cost | $25-45 for sleeve, frame, pole, tray | Rental typically $80-120/day as of 2026 |
| Cleanup | Rinse a sleeve, or bin it | 20-30 min flush plus tearing off plastic |
| Best fit | One painted ceiling in a furnished room | Whole house, empty rooms, raw texture, ceilings over 10 ft |
Spray settings that do not blast texture
Ceiling paint is thick, so it needs a wide fan and a large orifice, but popcorn also needs you to back off. Loose aggregate can be knocked off by the air moving in front of the fan before a drop of paint lands.
TIP
.015 - .021
12 in fan, e.g. a 517/519/521 style tip
DISTANCE
12-18 in
Further than you would hold it on a wall
OVERLAP
50%
Two coats crossed at 90 degrees
PRO TIP
Start pressure low and raise it only until the fan stops leaving heavy tails at the edges. And do not back-roll a popcorn ceiling — back-rolling is the standard move on new drywall and stucco, and it is the one thing that undoes everything spraying just bought you. Full gun technique is in our paint sprayer guide, and the broader method trade-off is covered in spray vs roll painting.
Picking Paint (and How Much Texture Drinks)
Buy paint sold as ceiling paint, in dead flat, and buy the thick one. Ceiling formulas are built with more body and spatter-resistant thickeners, which matters twice over here: a thick paint carries less free water into the texture, and it hangs on the nap instead of raining down on you while you work overhead.
FLAT, ALWAYS
Any sheen above flat rakes light across thousands of tiny shadows and turns the ceiling into a topographic map. Flat also hides the lap variation you will inevitably leave behind on texture.
HIGH-BUILD OR HIGH-SOLIDS
More solids per gallon means the valleys fill in one pass rather than needing a second, wetter pass. Watery contractor-grade flat is the cheapest way to lose texture.
COLOR-CHANGING FORMULAS EARN THEIR KEEP
Paints that go on tinted pink or blue and dry white are gimmicky on walls and genuinely useful here — from the floor, wet flat paint on white texture is invisible, and missed valleys only show up the next day.
DO NOT THIN IT
Not even for the sprayer, unless the label allows it and gives a maximum. Thinning adds exactly the water that dissolves the binder. If the gun struggles, go up a tip size instead.
Texture drinks 30-50% more paint
Bumps have surface area. A popcorn ceiling has roughly a third to half again the real surface of the flat plane it covers, and raw texture is absorbent on top of that. Treat the coverage number on the can as the smooth-drywall figure and derate it:
WORKED EXAMPLE — 12 x 12 BEDROOM
Buy two gallons. Running out mid-coat on a textured ceiling means a hard stop line you cannot blend, and a second trip means the ceiling sits half-wet while you drive. Run your own numbers in the paint calculator and add the texture surcharge on top.
For product-level picks — which flat lines actually cover in two coats and which ones spatter — see best paint for ceilings. If the ceiling is going white and the walls are changing too, do the ceiling first and read the order of operations in how to paint a room.
Step-by-Step: Painting a Popcorn Ceiling
Budget most of a day for one room including dry time. The rolling itself is fast; the prep and the mandatory wait between coats are what fill the schedule.
Test and read the ceiling
15 min + lab time
Age of the house decides whether you sample. State of the texture decides whether painting is even the right call. Do both before you buy paint.
- Pre-mid-1980s construction: collect samples per the lab's instructions and wait for results before anything else happens.
- Dry-fingertip test in a closet: chalk and loose grains mean raw, unsealed texture that needs solvent primer.
- Walk the plane with a flashlight held flat against the ceiling. Every stain, sag, crack, and bald patch shows up in raking light and none of them show up standing under a lamp.
- Tap suspicious areas with a fingertip. Anything that crumbles gets repaired, not painted.
Clear the room and mask everything
30-90 min
Popcorn jobs are won here. You are working overhead with a heavily loaded roller on a surface that sheds — assume everything below will get hit.
- Empty the room if you can. Otherwise center the furniture and tent it in plastic, not cloth.
- Canvas or paper on the floor, taped at the edges. Plastic sheeting on floors is a slip hazard on a ladder or pole.
- Drop light fixture canopies and bag ceiling fans rather than taping around them.
- Mask the wall, never the ceiling. Tape run onto popcorn texture pulls aggregate off when you remove it — run the tape 1/8 to 1/4 in below the ceiling line on the wall instead.
- Spraying? Plastic the walls floor-to-ceiling, seal doorways, kill the HVAC, and wear a respirator rated for the product.
Stain-block, then seal if the texture is raw
30 min + dry time
Water rings will ghost through three coats of latex, and raw texture will come apart under the first one. Both problems have the same class of answer: a solvent-based primer.
- Spot-prime stains with a shellac-based stain blocker. Use the aerosol version and mist it on — brushing a stain on popcorn drags the texture off around the ring.
- Never-painted ceiling: prime the whole plane with an oil-based or shellac primer. Spray it if at all possible.
- If you must roll primer over raw texture, one slow single pass with a fully loaded thick nap. No back-and-forth, no touching up.
- Let primer dry to the label's recoat time. Rushing it means the finish coat re-wets everything you just sealed.
Cut in the perimeter by dabbing
20-30 min
The cut-in is where most texture actually comes off, because the natural motion with a brush is to drag. Dragging a loaded brush across popcorn shears the aggregate clean off along the wall line.
- Use a 2 to 2.5 in angled sash brush, loaded heavier than you would on trim.
- Stipple, do not stroke: pounce the brush tip straight up into the texture and lift, working along the line. It looks crude up close and is invisible from the floor.
- Keep the band 2 to 3 in wide. Wider is wasted; narrower and the roller cannot reach it.
- Cut only one wall ahead of the roller so the two never dry into a picture frame — the same wet-edge rule from our ceiling guide.
Roll one direction, one pass — or spray it
45-70 min per coat
This is the whole technique. Load the nap until it is dripping-heavy, put it on the ceiling, move it in one direction, and do not come back to that spot until tomorrow.
- Thick nap: 3/4 in minimum, 1 to 1 1/4 in on heavy texture, or a slit-foam texture sleeve. Extension pole so you roll from the floor.
- Zero pressure. The roller's own weight plus the pole is enough — if you are pushing, you are grinding.
- Work in 3 x 3 ft sections, always rolling the same direction, overlapping the previous stroke by about a third.
- Expect coat one to look blotchy and thin. That is a sealed ceiling, not a finished one. Resist every instinct to fix it.
- Spraying instead: two crossed passes at 50% overlap, 12-18 in off the surface, and no back-rolling.
Recoat, then inspect with a raking light
2-4 hr wait + 45-70 min
Coat two does the covering. It goes on the same way, but perpendicular to coat one so the pattern averages out.
- Wait the full recoat time on the label — usually 2 to 4 hours. Rolling into half-dry flat paint is the single most reliable way to tear texture off a ceiling that survived coat one.
- Run coat two at 90 degrees to coat one. Same one-pass rule.
- Inspect at night with a work light held flat against the ceiling, not from the middle of the room.
- Missed valleys get a third coat over the whole plane, not a touch-up. Spot touch-ups on flat ceiling paint over texture always flash.
PRO TIP
If your ceiling is smooth, lightly textured, or knockdown rather than popcorn, none of the one-pass restrictions apply and you can lay the finish off properly — follow how to paint a ceiling instead. Vaulted popcorn is the hard case: same rules, but rent the sprayer, because holding a loaded 1 in nap overhead at the end of a 12 ft pole is how ceilings get pressed.
The Never-Do List
Every one of these is a normal, correct move on a wall or a smooth ceiling. That is exactly why popcorn jobs go wrong — experience on other surfaces actively works against you here.
Never re-roll an area that is half dry
Why it fails: Between roughly 5 and 20 minutes in, flat ceiling paint is tacky and the texture underneath is at its softest. A roller passing through that window works like sandpaper — it lifts aggregate in clumps and leaves bald grey patches of bare board.
Do this: One pass, then walk away. If it looks thin, that is what coat two is for.
Never press harder to get coverage
Why it fails: Pressure transfers load to the peaks of the texture, which are the weakest part of the ceiling. It also squeezes paint out the ends of the sleeve into ridges you cannot sand out afterward.
Do this: Reload the roller. Coverage comes from paint on the nap, not force on the pole.
Never roll latex onto never-painted texture
Why it fails: Raw acoustic texture is held together with a water-soluble binder. Water-based paint dissolves it on contact and the aggregate transfers to your nap.
Do this: Seal the whole ceiling with an oil-based or shellac primer first, sprayed if possible.
Never paint over water-damaged texture
Why it fails: Anything that has been wet has already lost its bond. It is loose right now, and the stained area is always smaller than the compromised area — you will take down more than you can see.
Do this: Fix the leak, dry the assembly, cut out the loose material, seal, patch, then paint the whole plane.
Never wash a popcorn ceiling before painting
Why it fails: Sponging is standard wall prep and catastrophic here. Water is the exact thing that releases the texture, and a sponge adds mechanical scrubbing on top of it.
Do this: Dry-dust with a vacuum brush held slightly off the surface. Grease and smoke get sealed with shellac, not washed.
Never run tape onto the ceiling texture
Why it fails: Tape sticks to the aggregate better than the aggregate sticks to the board. Pulling it leaves a bald stripe around the entire perimeter of the room.
Do this: Mask the wall a fraction of an inch below the ceiling line, or cut the line by hand with a brush.
Never thin the paint to make it spray easier
Why it fails: Thinning is adding the solvent that destroys the bond. It also drops the film build, so you need more coats — more wet passes, more risk.
Do this: Move up a tip size, raise pressure slightly, or use a paint formulated to spray as supplied.
Paint It or Remove It?
Painting is the cheap, fast, low-disturbance option, and for a sound ceiling it is usually the right one. Removal is the permanent one. The deciding factor is almost never taste — it is the condition of the texture and whether the room is being touched anyway.
PAINT IT IF
- The texture is intact and has already been painted once — the risky part of the job is behind you.
- A test came back positive for asbestos and the ceiling is undamaged. Coating intact material is the low-disturbance path; scraping it is the one that needs licensed abatement.
- It is a rental, a flip, or a room you want done this weekend rather than done over.
- The ceiling is vaulted or over 10 ft. Scraping and skimming overhead at that height is a different order of job.
- You are only fixing appearance: yellowing, nicotine, a repaired stain, or a color change.
REMOVE IT IF
- More than a fraction of the plane is water damaged, sagging, or already shedding on its own.
- You are gutting or re-drywalling the room anyway, so the ceiling is coming down regardless.
- You want a genuinely flat, modern ceiling. No paint job makes popcorn look like smooth drywall.
- You are prepping to sell in a market where popcorn reads as dated and buyers price it as a deduction.
- The texture is thin and patchy already — you would be patching more than painting.
What the two routes cost
| ROUTE | TYPICAL RANGE | WHAT IT BUYS |
|---|---|---|
| Paint it, DIY | $0.15-$0.35 / sq ft | Paint, sleeves, masking. A day of your time. |
| Paint it, hired out | $1-$2.25 / sq ft | Two coats, masking, and someone else owning the risk. |
| Scrape only | $1-$3 / sq ft | Texture gone, ceiling still needs finishing. |
| Remove and finish | $2-$6 / sq ft | Scrape, skim, prime, paint. A smooth ceiling. |
Typical U.S. ranges as of 2026, excluding asbestos abatement. Full breakdown by room, method, and region in our popcorn ceiling removal cost guide, and you can price the repaint side in the interior painting cost calculator.
THE PART NOBODY MENTIONS
Painting popcorn makes removing it later harder and more expensive. Unpainted texture soaks water and scrapes off wet in sheets; a painted one repels the water you spray on it, so the scraping turns into dry chiselling, dust, and a lot more drywall damage to repair. If removal is anywhere in your five-year plan, do it before you paint, not after.
When Texture Comes Off Anyway
First rule when you see bare board on the roller: stop. Do not try to push the texture back on, do not roll over it to hide it, and do not keep working the surrounding area — wet, disturbed texture is at its most fragile in the minutes right after it lets go. Everything gets easier once the ceiling is bone dry.
A few grains on the roller
COSMETICNormal. Every popcorn ceiling gives up a little aggregate. Keep going, keep the pass count at one, and do not chase it. Pick the grains out of the nap before the next load so they do not get pressed back into the finish.
Bald spots under about 3 in
SPOT REPAIRStop rolling that section and let the ceiling dry completely — overnight is safest. Fill with an aerosol popcorn patch or premixed texture matched to the aggregate size, feather the edge, let it cure, spot-prime with shellac, then paint the entire ceiling plane so the sheen matches.
A patch bigger than a dinner plate
REAL REPAIRCut the loose material back to a sound edge with a putty knife rather than tearing it. Prime the exposed board, re-texture in one session so the pattern reads continuous, then prime the patch and repaint corner to corner. Matching texture is a practice-on-cardboard skill — do a test board first.
More than roughly a quarter of the plane
CHANGE THE PLANThe economics have flipped. Patching a quarter of a ceiling costs more in time and materials than scraping the whole thing and finishing it properly, and it never quite matches. Price the removal route instead.
PRO TIP
Never touch up a repair with a brush and call it done. Flat ceiling paint over fresh texture flashes at a different sheen than the paint around it, and on a ceiling every window in the room will show you that patch for the rest of its life. Always repaint the full plane, wall to wall. If the paint is failing rather than the texture — sheeting, curling, or peeling in flakes with paint film attached — that is an adhesion problem, and how to fix peeling paint covers the diagnosis. Losing more than you can patch? Compare it against the numbers in popcorn ceiling removal cost.
Popcorn Ceiling Painting FAQ
Popcorn Ceiling Cheat Sheet
PRINT THIS AND TAPE IT TO THE PAIL
KEY NUMBERS
SPRAY SETTINGS
ORDER OF OPERATIONS
THE FOUR NEVERS
- Never re-roll a half-dry area.
- Never press — reload instead.
- Never roll latex onto raw, unsealed texture.
- Never tape onto the ceiling, or wash it first.
IF IT IS NOT POPCORN
Smooth, orange peel, and knockdown ceilings have none of these restrictions. Use the standard ceiling method →
RELATED TOOLS & GUIDES
How to Paint a Ceiling
The full ceiling workflow for smooth and lightly textured drywall — cut-in, rolling pattern, second coat.
GUIDEPopcorn Ceiling Removal Cost
What scraping, skim-coating, and asbestos abatement actually cost if you decide painting isn't enough.
GUIDEBest Paint for Ceilings
Which flat ceiling paints hide flaws, resist spatter, and cover in two coats over texture.
COMPARISONSpray vs Roll Painting
Speed, masking time, paint waste, and finish quality compared across the two application methods.
FREE TOOLPaint Calculator
Get your gallon count first, then add the texture surcharge before you leave for the store.